
![DIY Pom [Tutorial]](http://thelovelylauralife.com/wp-content/uploads/2014/02/img_1556.jpg) Leading up to creating this tutorial I had come across the image below. This photo was my original inspiration for creating poms for a baby shower that my mother-in-law were getting ready to throw in February. The original post was not a tutorial on DIY poms, but rather linked here.
Leading up to creating this tutorial I had come across the image below. This photo was my original inspiration for creating poms for a baby shower that my mother-in-law were getting ready to throw in February. The original post was not a tutorial on DIY poms, but rather linked here.
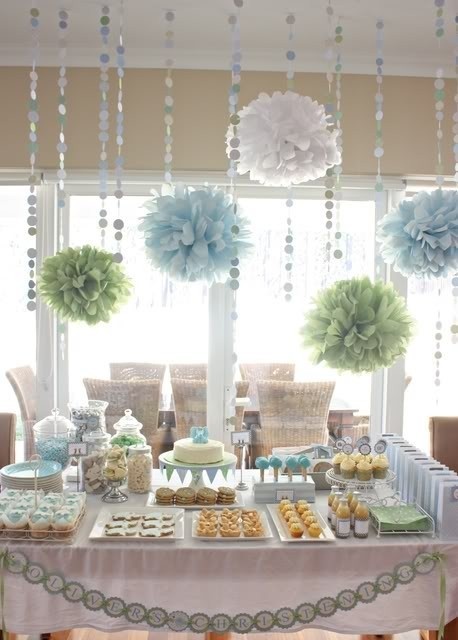 No more than a few minutes after I had pinned this image on Pinterest, did another fellow crafter friend of mine reach out to me and give me a few handy tips on DIY pom best practices! Result? This handy-dandy fully illustrated DIY pom tutorial. Hope you find it handy!
![DIY Pom [Tutorial]](http://thelovelylauralife.com/wp-content/uploads/2014/02/img_1550-copy.jpg) Supply List:
Supply List:
- Tissue paper (lots of it — your choice of color)
- Styrofoam balls (one per pom)
- Scissors
- Floral pins (about 1/2 box per pom)
- Patience (yep)
DIY Pom [Tutorial]
Start but cutting your tissue paper down to size. I opted for large square pieces about 10″ x 10″. The larger you make the squares, the fuller the pom will potentially look.
![DIY Pom [Tutorial]](http://thelovelylauralife.com/wp-content/uploads/2014/02/img_1552-copy.jpg)
Take a floral pin and poke it through the center of a single piece of square tissue paper. Then sort of fold/pinch/scrunch the tissue paper back, in the direction of the ball of the floral pin.
![DIY Pom [Tutorial]](http://thelovelylauralife.com/wp-content/uploads/2014/02/img_1553-copy.jpg)
![DIY Pom [Tutorial]](http://thelovelylauralife.com/wp-content/uploads/2014/02/img_1554-copy.jpg)
You should be holding the ball of the pin through surrounded by the tissue paper sort of like above. You will then be able to insert the pin into the styrofoam ball! Like so…
Now this is where the patience part comes into play. Place pins 1-3 inches apart from one another. As you continue placing pins and filling up the ball, the tissue paper pieces will hold themselves up and out giving it a full look. You can tailor just how full you want your particular pom to look by placing them closer together or farther apart, it’s really up to you!
![DIY Pom [Tutorial]](http://thelovelylauralife.com/wp-content/uploads/2014/02/img_1555-copy1.jpg)
![DIY Pom [Tutorial]](http://thelovelylauralife.com/wp-content/uploads/2014/02/img_1551.jpg)
As you start to really fill up the ball with tissue pieces you may worry about setting the pom/pouf down for fear of squashing it! No worries! I found that while it can be a delicate process actually pinning the tissue to the pom without ripping it… the pom itself is quite durable. Any squashing that might happen fluffs right out.
Rest assured that the thing that poses the most threat to a pom are little tiny fingers that must… reach… itttt…
![DIY Pom [Tutorial]](http://thelovelylauralife.com/wp-content/uploads/2014/02/img_1558.jpg)
And there you have it!
Check out these poms in action on another post, A Little Man Mustache Bash [Baby Shower]!