![DIY hand stamped t-shirt and design ideas [tutorial]](http://thelovelylauralife.com/wp-content/uploads/2014/06/photo-22.jpg) A month or two ago I decided that I was going to finally bite the bullet on making Wyatt a few t-shirts on my own. Eventually I’ll get to the sewing them myself as well, but for this project I decided that I wanted to create some stamped shirts for him.
A month or two ago I decided that I was going to finally bite the bullet on making Wyatt a few t-shirts on my own. Eventually I’ll get to the sewing them myself as well, but for this project I decided that I wanted to create some stamped shirts for him.
I wasn’t sure if he was going to when I made it, but Wyatt wore the mustache patterned tee at his 1st birthday party a couple weeks ago. You may have also seen him in it a couple times if you follow me on Instagram.
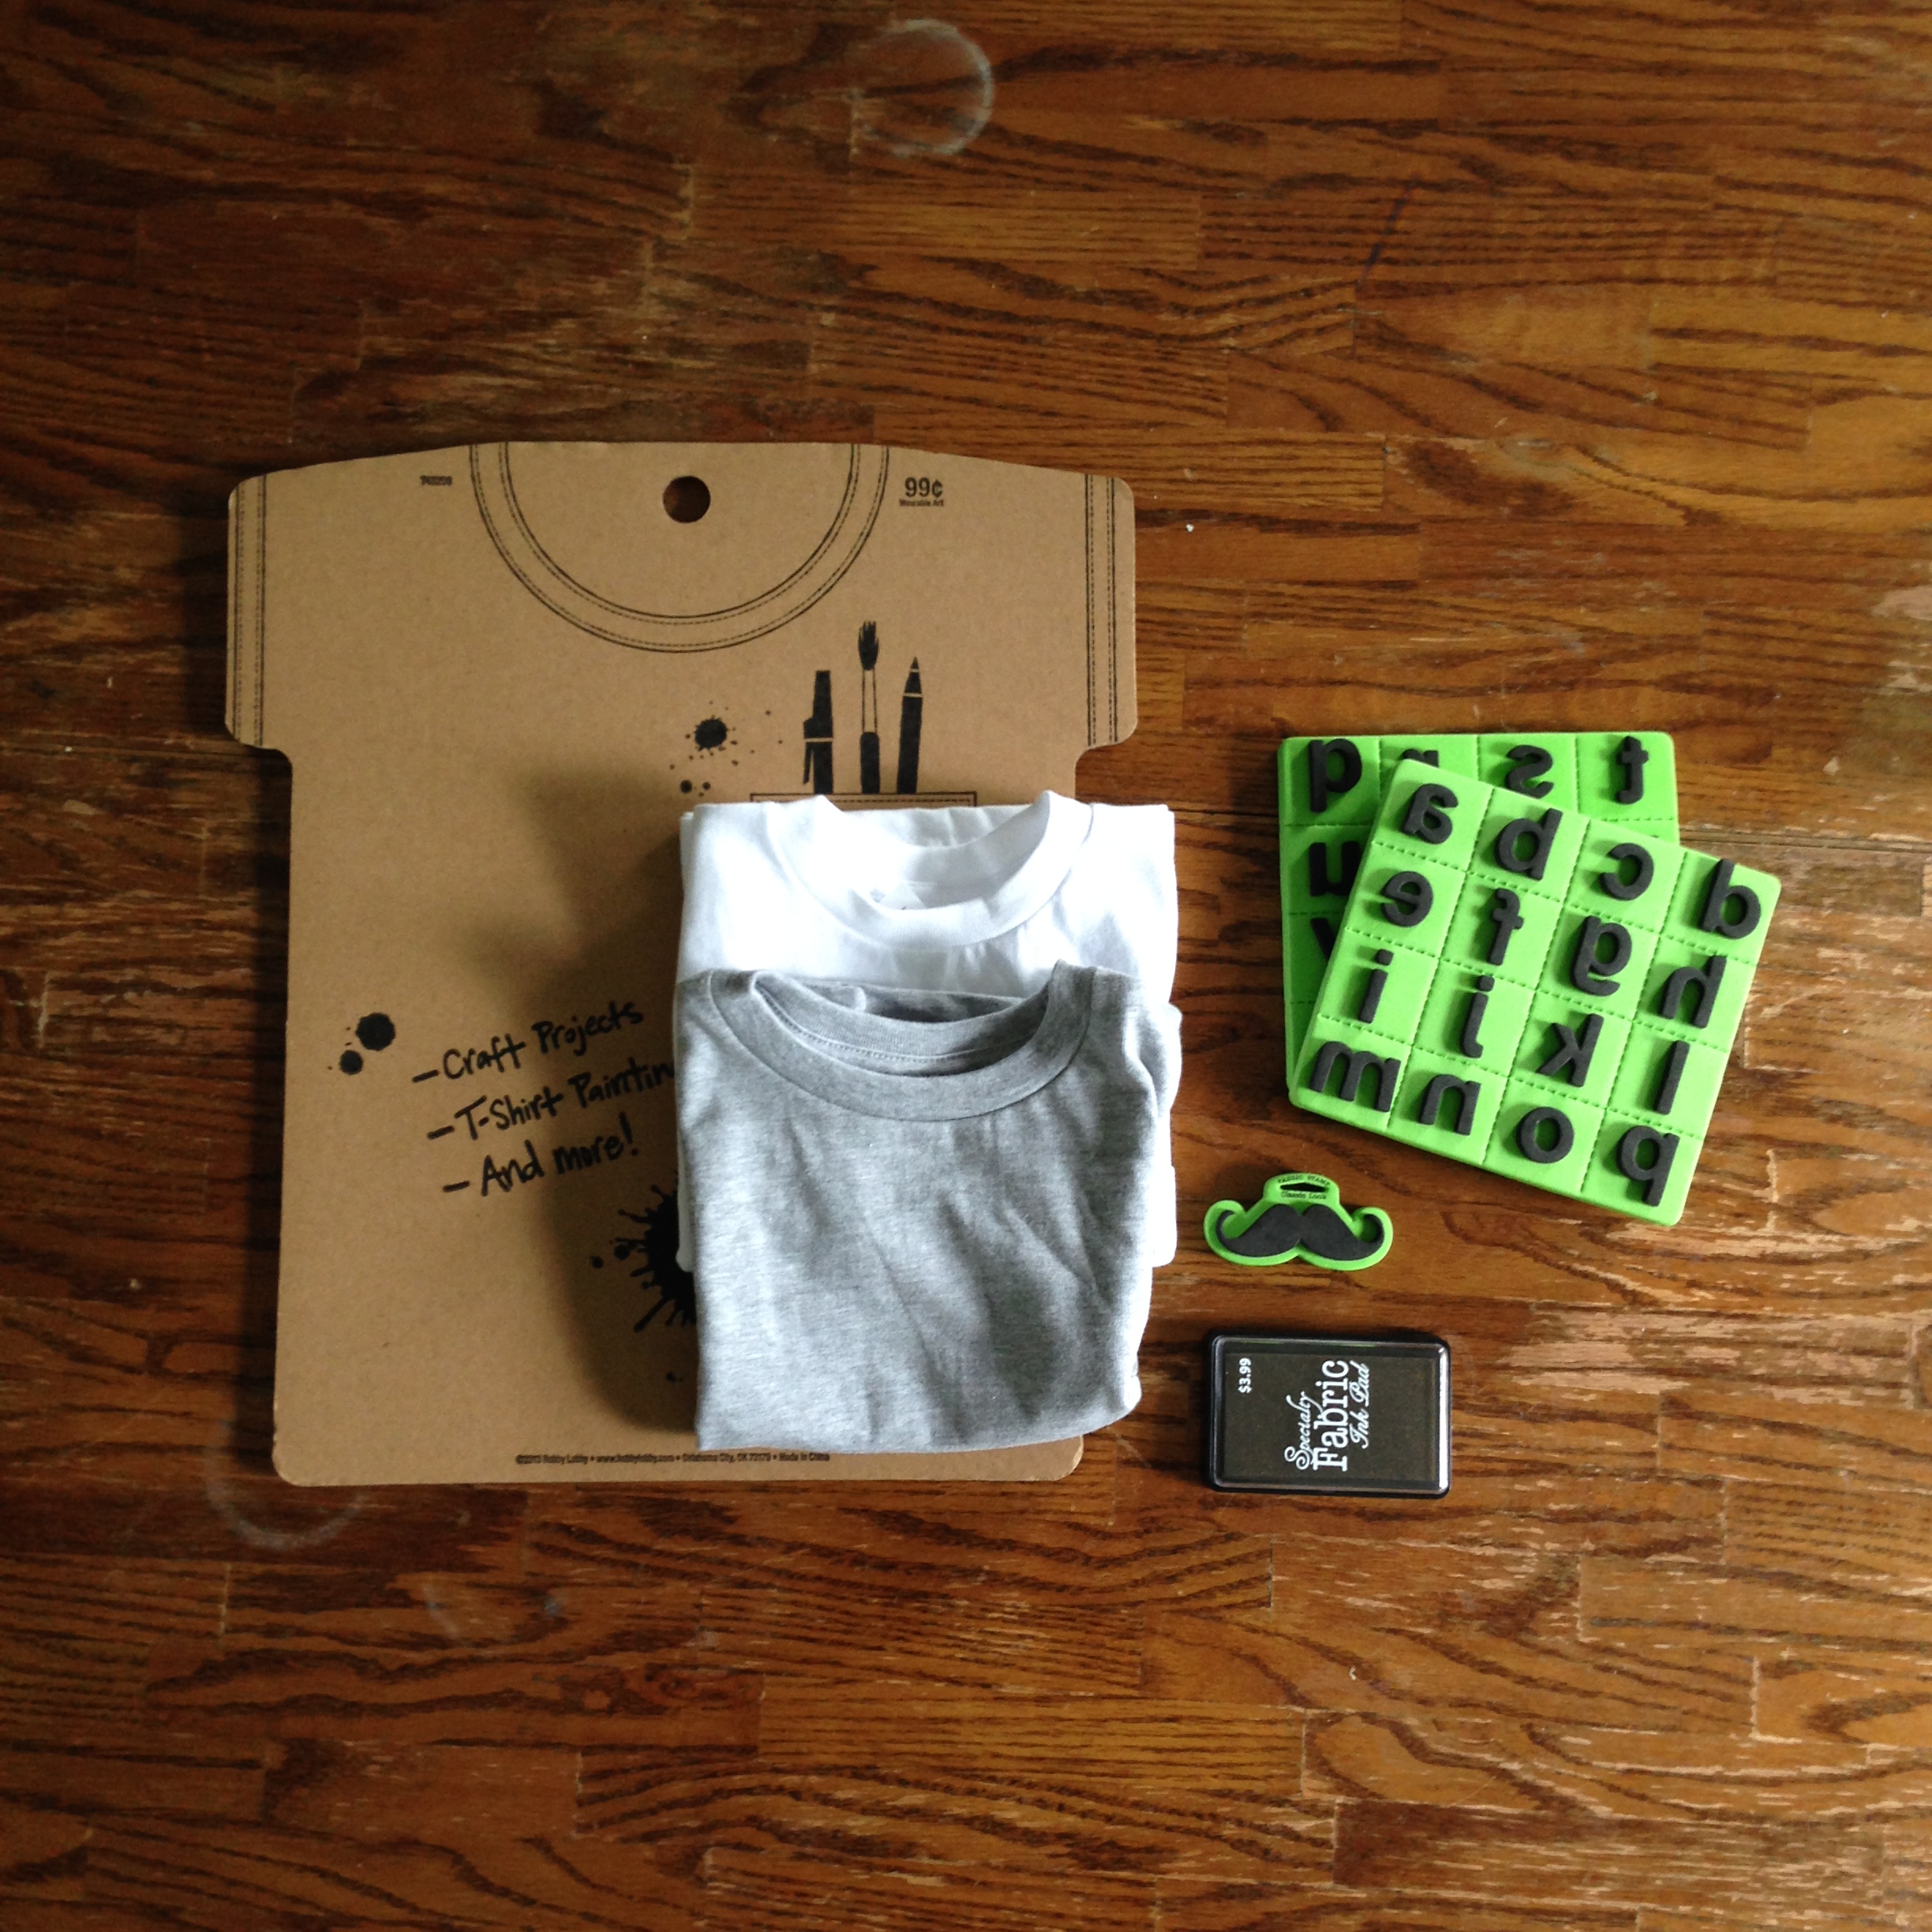
I bought all of my supplies this time around (scoping out some other options for the future) at Hobby Lobby:
SUPPLIES
cardboard T-shirt stretcher (optional, but for optimal results)
grey + white t-shirt(s)
alphabet stamps + mustache stamp (or whatever stamp you like!)
dark brown fabric ink pad
![DIY hand stamped t-shirt and design ideas [tutorial]](http://thelovelylauralife.com/wp-content/uploads/2014/06/photo-31.jpg)
1. Pre-wash fabric to be stamped if possible.
2. Stretch t-shirt onto cardboard.
3. Press stamp firmly onto ink pad, lift off and repeat multiple times to insure good contact and even ink coverage.
4. Place stamp on desired location of t-shirt. Press firmly into t-shirt.
5. Remove pressure and then press stamp again. Repeat a few times depending on desired look.
![DIY hand stamped t-shirt and design ideas [tutorial]](http://thelovelylauralife.com/wp-content/uploads/2014/06/photo-51.jpg)
![DIY hand stamped t-shirt and design ideas [tutorial]](http://thelovelylauralife.com/wp-content/uploads/2014/06/photo-12.jpg)
Note* I liked the “typewriter effect” that was created from pressing the entire stamp down into the shirt allowing the square outline of the stamp to be incorporated into the design. If you don’t like this look, then be careful so that the stamp edges do not make contact when applying pressure to the stamp onto the t-shirt.
I unfortunately can’t take credit for this cute design. My original inspiration came via a tee from Rosie & Oliver, you can follow them on Instagram @rosieandoliver
![DIY hand stamped t-shirt and design ideas [tutorial]](http://thelovelylauralife.com/wp-content/uploads/2014/06/photo-42.jpg)
6. To create a t-shirt with a patterned look, I suggest starting off with an alternating or “brick” pattern.
![DIY hand stamped t-shirt and design ideas [tutorial]](http://thelovelylauralife.com/wp-content/uploads/2014/06/photo-23.jpg)
![DIY hand stamped t-shirt and design ideas [tutorial]](http://thelovelylauralife.com/wp-content/uploads/2014/06/photo-32.jpg)
TIP: I recommend continuing the stamp pattern right off the edge of the t-shirt. This helps give it the look that the t-shirt was made with a stamped fabric (versus stamped after the fact). It’s a personal preference, but one simple way to make your piece look a little more professionally designed.
7. Let ink dry.
8. Heat set image with iron on medium setting, no steam.
And there you have it! Happy, happy stamping!
![DIY hand stamped t-shirt and design ideas [tutorial]](http://thelovelylauralife.com/wp-content/uploads/2014/06/diy-hand-stamped-t-shirt-and-design-ideas-tutorial1.png)